Arduino - Ultrasonic Sensor
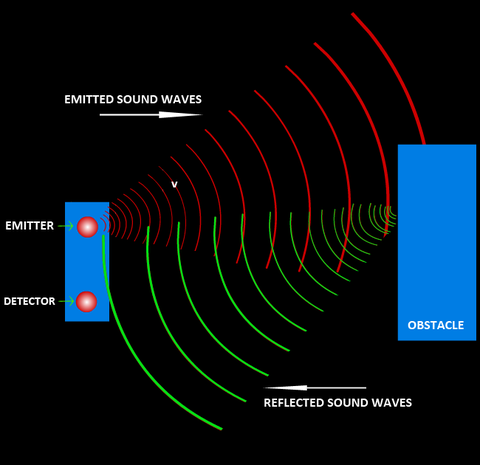
The ultrasonic range finder sensor uses sound to measure distance to an object. It first sends out a sound wave that is above the range which we can hear at. When the sound wave hits an object, it will bounce back towards the sensor which will hear the echo. The arduino measures how long it took for the sound wave to travel there and back and knowing the speed of sound, we can use that to calculate how far away the object is.
Ultrasonic Sensor Circuit
Your ultrasonic sensor will have four pins. One for power, one to send the initial pulse, one to listen for the echo pulse, and a ground pin. They are labeled Vcc, Trig, Echo, and GND, respectively. Plug your sensor into any 4 rows on the breadboard and connect them to the arduino as on the image.
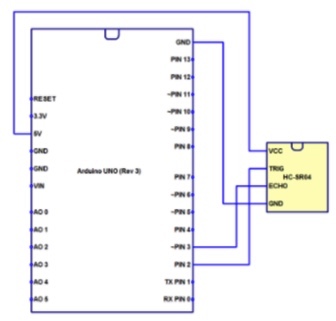
- Vcc -> 5V,
- Trig -> pin 2
- Echo -> pin 3
- GND -> GND
Ultrasonic Code
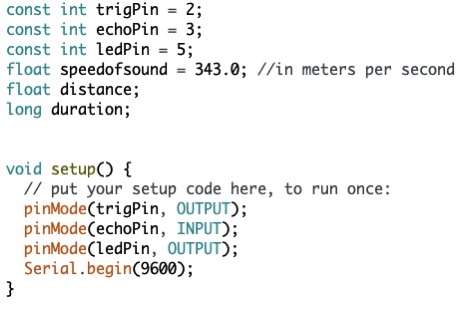
We'll need to set up our pins and constants as always.
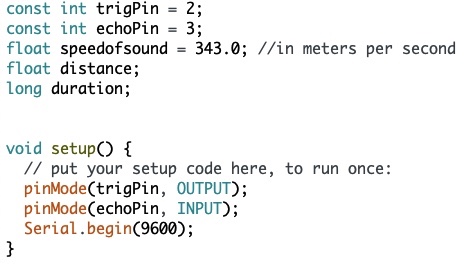
We'll need the speed of sound to calculate distance later. It's also important to keep the .0 after 343 so that the compiler doesn't treat it like an integer and drop the decimals when we do math with it.
Now, onto the loop.
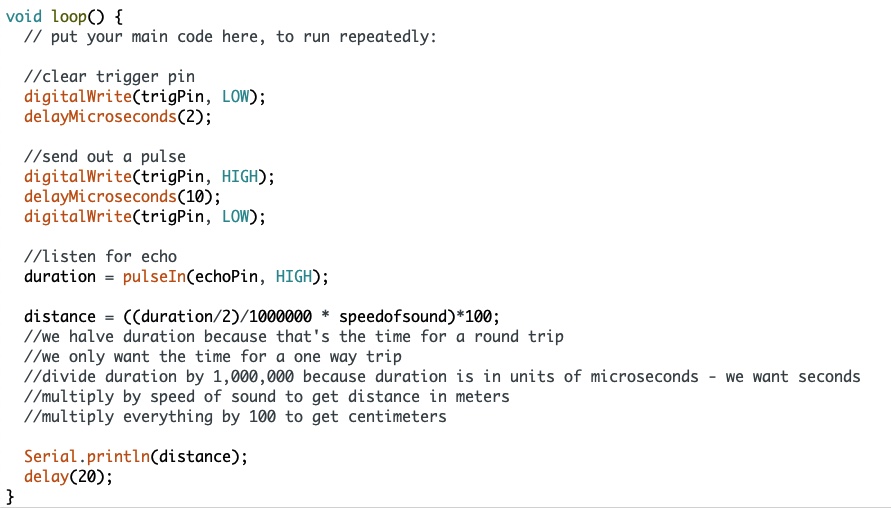
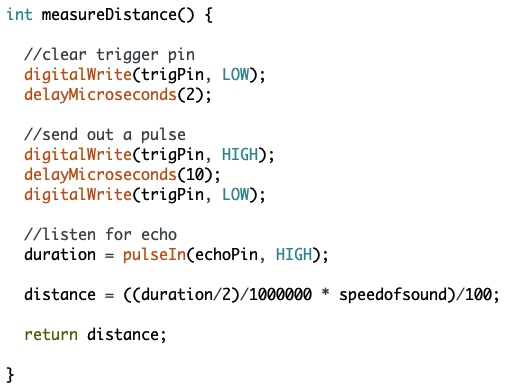
We first send out a pulse and record the time it takes for it to return. Then, we do some math.
Distance is speed times time. We already have the time the ultrasonic wave took to bounce back. But what speed does the ultrasonic wave travel at? Since it is a sound wave, it travels at the speed of sound, about 343 meters per second. Luckily, we've already defined a variable for this at the beginning.
Next, we do some conversions to find the final distance in centimeters. These are described in the code's comments.
Now when you run the code, you should see a constant stream of numbers in the serial monitor. These represent the distance in centimeters from the nearest object in front of the sensor.
Applications of the Ultrasonic Sensor
Let's use the ultrasonic sensor to make a proximity activated light. Our arduino will turn on an LED whenever something crosses in front of it within a certain distance. Keep your old ultrasonic code as we'll reuse most of it.
You'll use the same circuit from earlier, except you'll connect an LED and resistor to your breadboard in addition to the ultrasonic sensor. Make sure the LED and all wires are clear from the front of the sensor.
The setup for the code will be the same as well with additional lines for the new LED.
Here's the big difference though. Your distance measuring code will be moved to its own separate function. This is what your loop function will look like now.
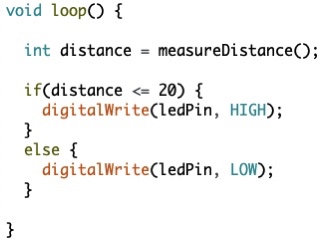
measureDistance() is going to be your loop code from the last project but we will have it return the distance as an int.
In this one project, we've put together pretty much everything you've learned so far. You can do a lot with just this basic knowledge of functions and if statements.
code and lesson adapted from UCLA Physics 4AL