MicroBit: Intro To Randomness and Conditional Statements
Objective
Roboteers will code their MicroBit to randomize a number using conditional statements
Essential keywords
Conditional Statements
If-Else Block
Attention (5 Min.)
Let's check out this related video!
In this lesson, we will learn how to make a simple Magic 8 Ball. A Magic 8 Ball is an old school toy which has a dice on the inside of a fluid filled ball. A kid would ask the ball a question and then shake the ball. The face of the dice that is shown can be taken as a "magic answer". To simplify this code, we will stick to yes or no questions and have the MicroBit display either a check mark for "yes" or an X for "no".
We can start by clearing out our workspace.
Our code will run when the A-button is clicked which means we don't need the on start or forever blocks. From the input section we will grab a on button A pressed block.
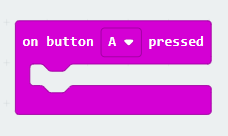
This block will contain all of our code.
Conditional Statements
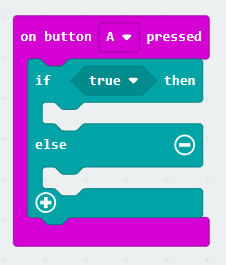
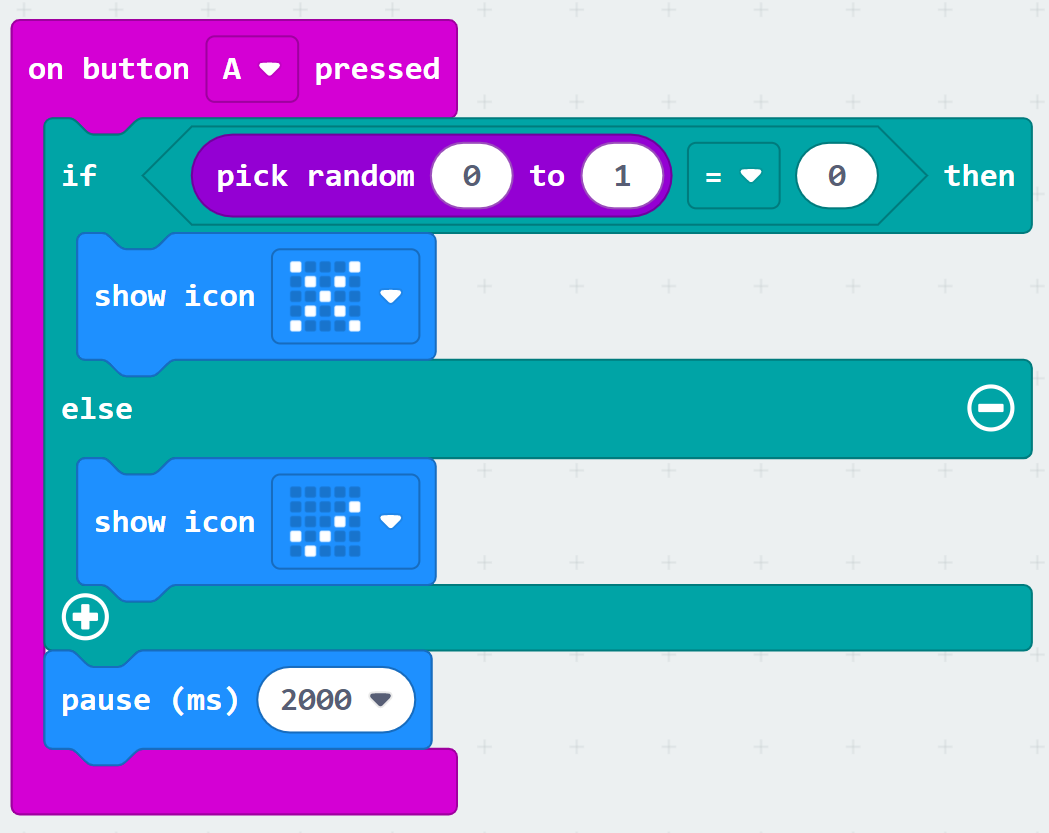
Inside of this starting block we will add an if-else block from the logic section. An if-else block is a conditional block because it makes a decision about what code to run based on a condition. It checks whether or not a certain criteria has been met; if it has it runs one set of code, otherwise it runs different code. For example, imagine you are choosing between having cereal or eggs for breakfast. Before you start making cereal, you may want to check if you have milk or not. If you do have milk, you will make cereal, but if you don't, you will have eggs. In this scenario, the condition is whether you have milk or not. If the condition is true, you will run the first set of code, otherwise you will run all the code under "else".We will use the if-else to answer no when the criteria is met and yes when it is not.
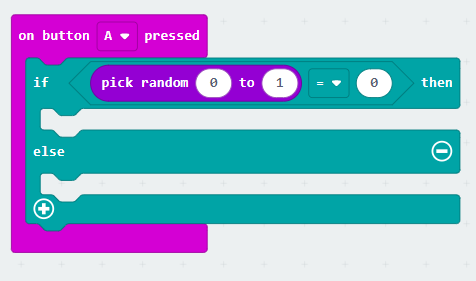
The criteria being checked is called a condition and it goes in the hexagonal shape of the if-else block. For our condition we will create a random number and check if it is equal to the number 0. We can start by putting an equals comparison block from the logic section inside of the condition; this checks whether two things are equal to one another.

Next we need to create our random number. Inside of the math section there is a pick random 0 to 10 block. We can set this as 0 to 1 instead. Setting it as 0 to 1 gives us two possible options for our random number, 0 or 1; we only need two possible numbers because we only have two possible answers in our 8 Ball. We will essentially be treating the number 0 like a no and the number 1 like a yes.
Next we want to display our icons on the LEDs. If we head over to the basic section, there is a show icon block. If we click the drop-down menu for the block we can see a variety of different icons; for our program we need an X in the if and a ✔ in the else. You can use other icons to represent no and yes if you want, but they have to be different from each other.
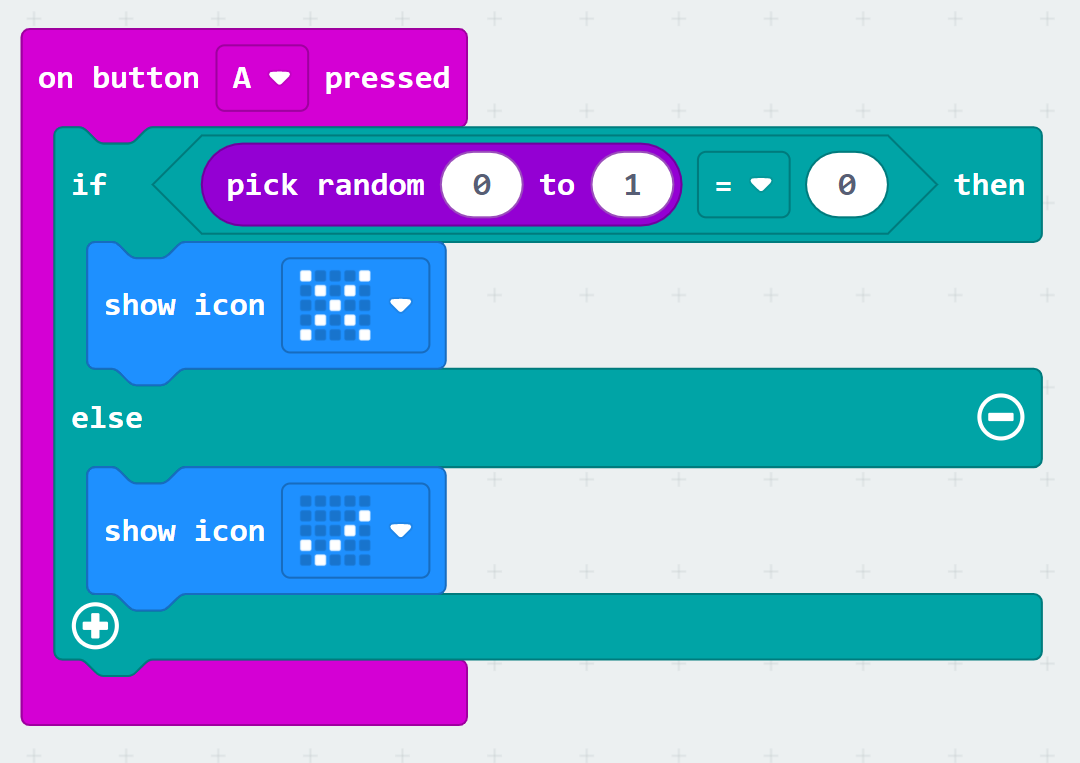
Now we can test out our code by pressing the play button on the left-hand side and clicking on the a button (which we chose as our trigger). You should see either an X or a ✔ displayed.

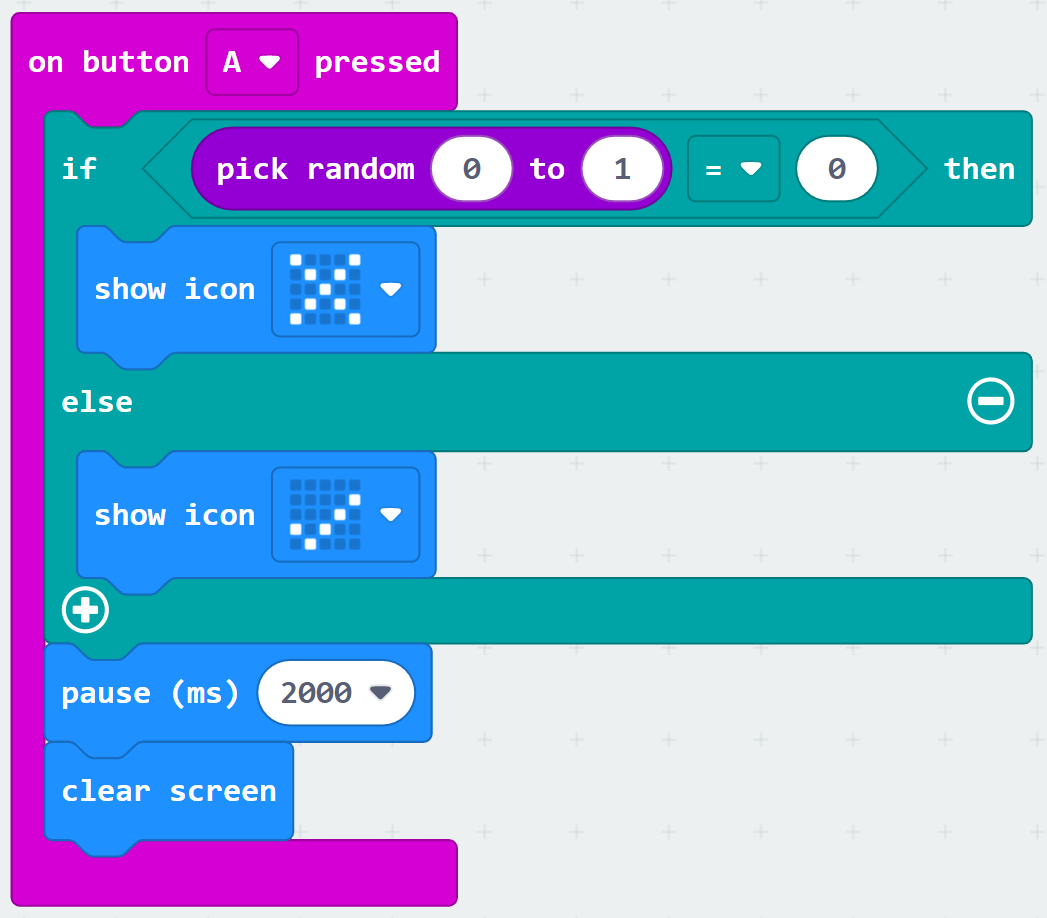
The final steps are to add a pause and clear the screen. This step isn't required for the program to work, but it helps make it easier to understand. If we don't clear the screen and the same icon appears twice in a row, we won't be able to tell the difference between the first answer and the second; we might think the magic 8 ball ignored our question. Clearing the screen will give us a clear separation between answers.
We need to add a pause before we clear the screen otherwise we would never see the icon. Inside of the basic blocks there is a pause (ms) block; we have to add it after our if-else and set it to a comfortable number. The numbers are in milliseconds so after you make your selection, it will be displayed as a larger number. I selected 2 seconds for mine and it displays 2000 ms; these are the same thing.
Now we clear the screen; this block is also found inside of the basic section and is called clear screen. We add it after our pause and we're done. The screen will be cleared after each answer making it easy to use and understand.
Displaying Random Numbers
Sometimes it may make sense to use a randomly generated number directly instead of using it as part of a a conditional statement.
Making random numbers generate is a basic principle in learning how to code. This can be done to simulate rolling a single die. By going to the purple "Math" blocks you could see the "pick random from ___ to ___". This allows you to set a beginning number and an ending number that you want to choose your random number from. To create the dice code it is just using the "pick random number" on the shake input to act more like a dice. The following shows how to do this using Micro-Bits.

The same effect could have been reached by generating a random number and then using multiple if statements each with a "show leds" block related to each number to display a random number. But since MicroBits already has a "show number" block, it is much more efficient to do it this way. By using the "show number" and tying that to a randomly generated number, the code is much more readable and more efficient.
Explore (25 - 30 Min.)
Time to customize!
4. Share (Min.)
Peer review!
Students can share their work with peers for constructive feedback and then use this feedback to revise and improve their work.
5. Closure (Min.)
If time, review content. Summarize.
6. Evaluate
Students reflect on their performance. Give positive and constructive feedback on each student
Essential Questions
What is a conditional statement? Can you think of a scenario in which you use a conditional statement?
Explain when and why the code under "else" runs.