Lesson 4: Fasteners and Tools
1. Attention (5 Min.)
Have students watch the following video:
Ask the students what they think the purpose of screws and nuts are? How many different types of locking nuts did the video show, can they name any? Was one better than another? What is Friction, what is tension? When might you want to use one type of locking nut over the other?
2. Learners Guidance
The Nuts and Bolts of Robot Building
We need fasteners to hold our robot together. Technically we are using screws rather than bolts. The main size screw is called 8-32. This is a designation that tells us the diameter of the screw and the number of threads per inch. The 8 diameter does not convert directly to a measurement in inches, just the larger the number the bigger the diameter. In the case of a number 8 screw the diameter is 0.164 inch or 4.2 mm
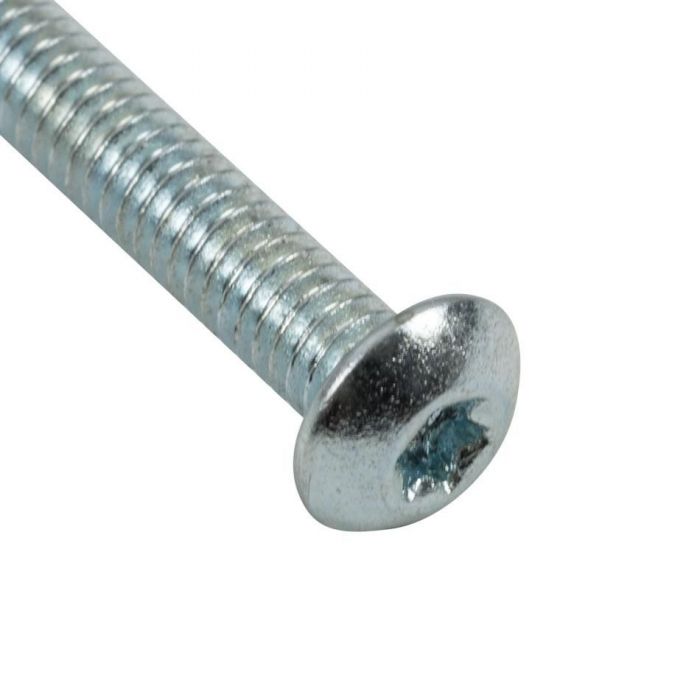
We will be using mostly star drive screws for our robot assembly. They are called star drive due to the shape of the screwdriver used with them.
When assembling parts the screw typically goes through 2 pieces of metal to hold them together or though a part and the metal. The screw is held in with a nut.
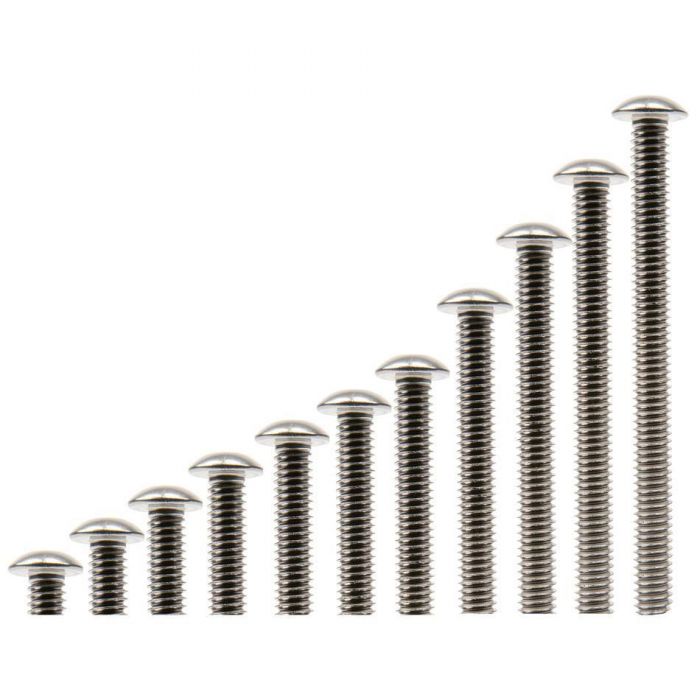
Screws come in many sizes increasing by 1/8 of an inch up to 1 inch then by 1/4 inch up to 2 inches. With all these options you should always use the screw that is just long enough for the job. Also note that for the vex competition the maximum screw length is 2 inches.
Locking Fasteners
One of our design rules at Rolling Robots is to use locking fasteners. A locking fastener has a means for not allowing the screw to unscrew easily. On the robot vibrations will make a screw loosen over time, this can be bad.
We use 3 main types of locking. Star or Keps Nuts have a star ring with sharp teeth that bite into the metal to prevent it from unwinding. The Star nut is suitable for most of our building purposes. The nylok has a piece of nylon that makes the nut hard to turn. The nylok is good in places where we may not tighten the screw all the way since the locking mechanism does not require tightness of the screw. In places where we do not use a nut like on the motor screws or when screwing into a standoff we need another locking system. Here we will use Locktite, which is kind of a glue for screws. We may also use locktite on star nuts for extra safety.
Note that the VEX competition rules change from year to year about what locking mechanisms can be used.
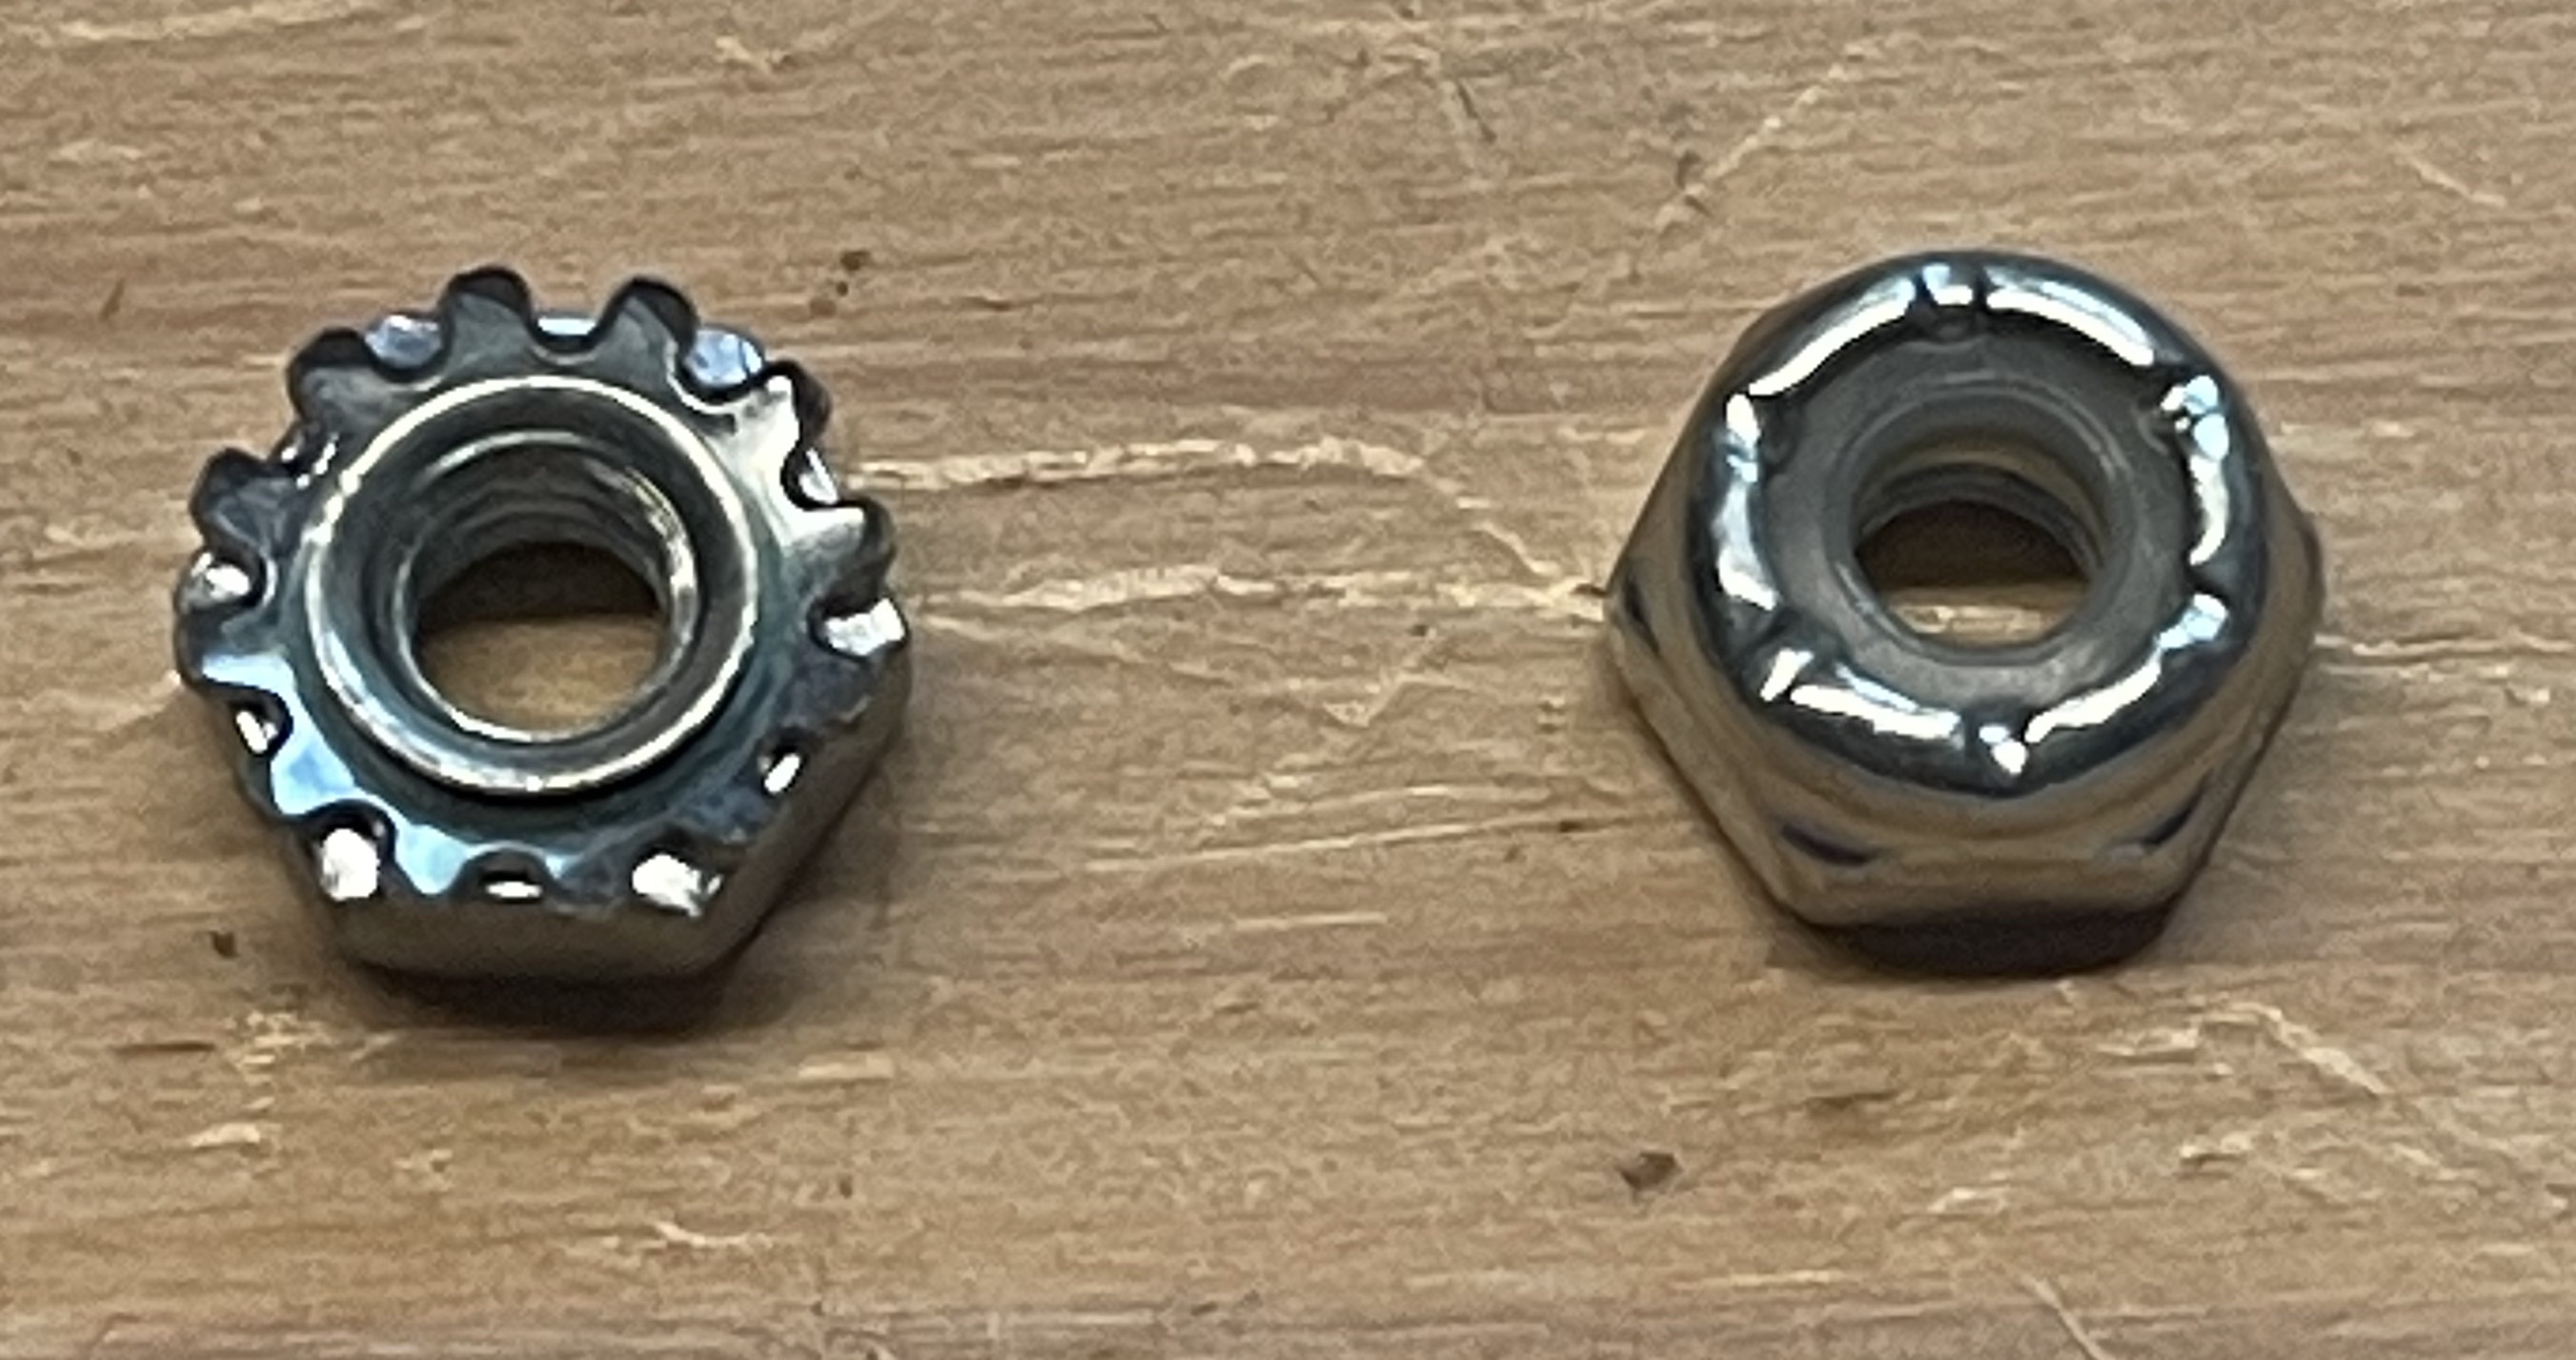
Star Nut and Nylok
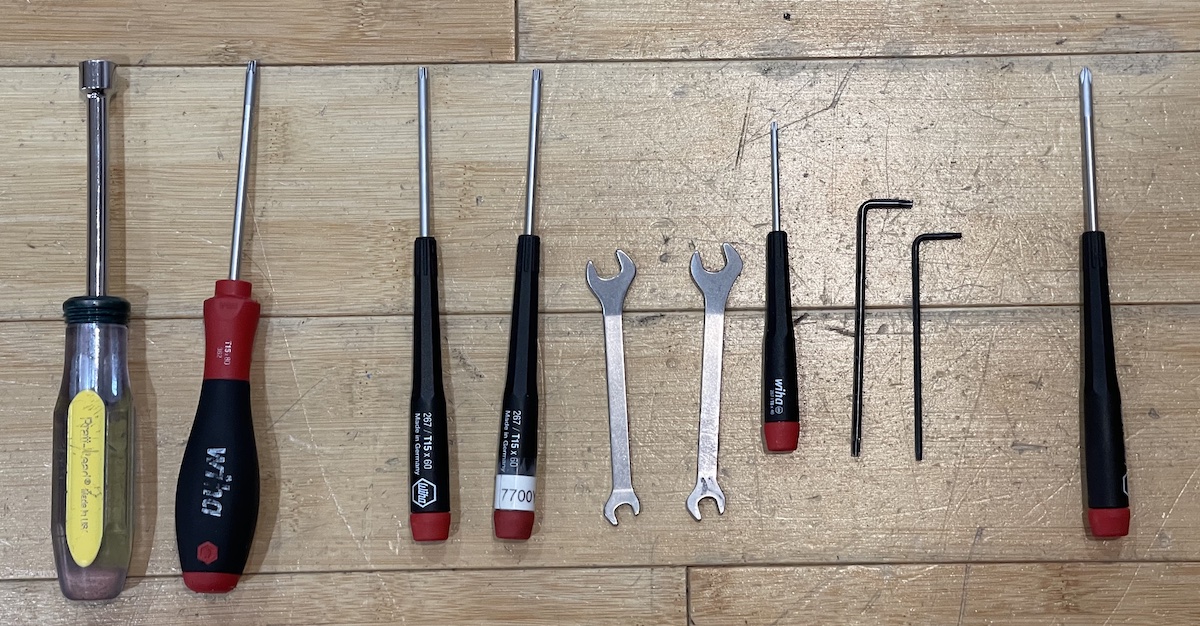
The basic tools we use with star drive fasteners
- Nut Driver
- T15 "Fat Boy"
- Star Drive T15 screwdriver
- Monkey Wrench
- Star Drive T8 screwdriver
- Star Drive L Wrench T15, T8
- PH1 screwdriver
Tools
The tools we use are Star Screwdriver, Star Drive L-Wrench both size T15. Monkey Wrench size 11/32 and a NutDriver for the nuts. The L wrench is the gives leverage for tightening and also is able to get into tight spaces, The screwdriver types are easier to use. The "Fat Boy" screwdriver has a fat rubber grip that makes it comfortable to use and gives somewhat more leverage for tightening. For the nuts the nut driver makes your job easier, while the Monkey Wrench gets into tight spaces and gives leverage. The monkey wrench is particularly useful in taking things apart.
The Tape Trick
Sometimes you need to put a screw or a nut into a space where your fingers will not fit. A simple trick is to tape the nut to a wrench to hold it while you put it in place. Can also use this to hold screws to the screwdriver.
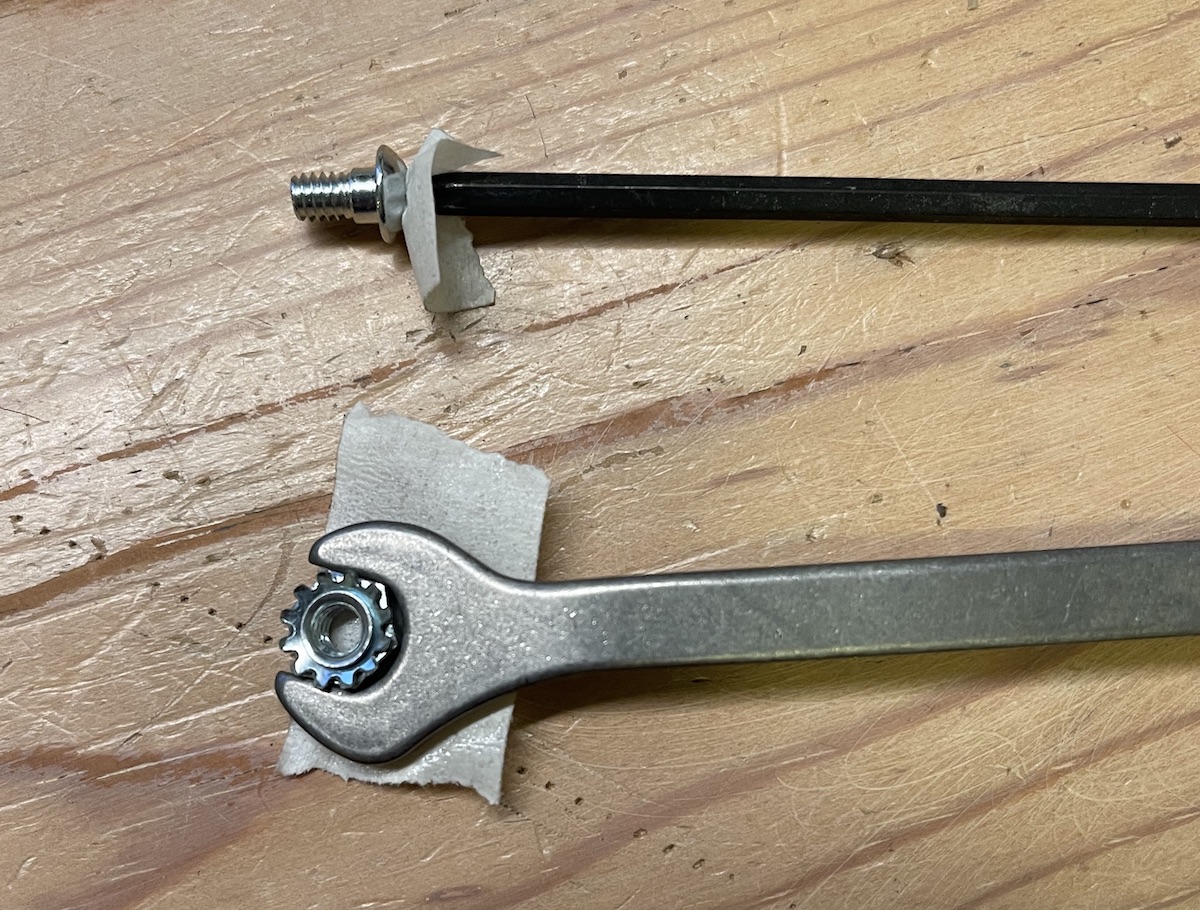
Using tape to hold a fastener to a tool. This will help you get parts together in places your fingers don't fit.
More Details
More details about choosing the right fastener can be found at VEX Knowledge Base
3. Explore (25 - 30 Min.)
Now that students have a basic understanding of tools and hardware, have them build a basic shape out of c channel using screws and nuts. For example, students can try to build a cube out of c-channel or a two dimensional house. This is a great time to get students comfortable with how many screws it takes to secure two c-channels together, as well as incorporating rotation through a screw joint. More advanced students can build more complicated structures like a windmill or a two dimensional car with wheels. Feel free to use other vex components as decorations such as pulleys for eyes.
4. Share ( 15 Min.)
Have the students share what they were able to build, making sure to ask what tools they used for each job, along with why they chose a given fastener for the job.
5. Closure (5 Min.)
Remind students of the different tools and fasteners used in vex robotics. Ask questions such as what is a screw used for, or what kind of nut would be used in a given situation.