Pneumatics
Air Pressure Controlled Movement
With Pneumatics we can make linear motion using air pressure and software controlled valves. The VEX system provides for single acting and double acting pistons. A single acting gives a push with air pressure, while the double acting can give a push or pull force with air. Mostly we use double acting, if we need only single we just use one side of the double acting.
2023 New Product
A new system was released in 2023
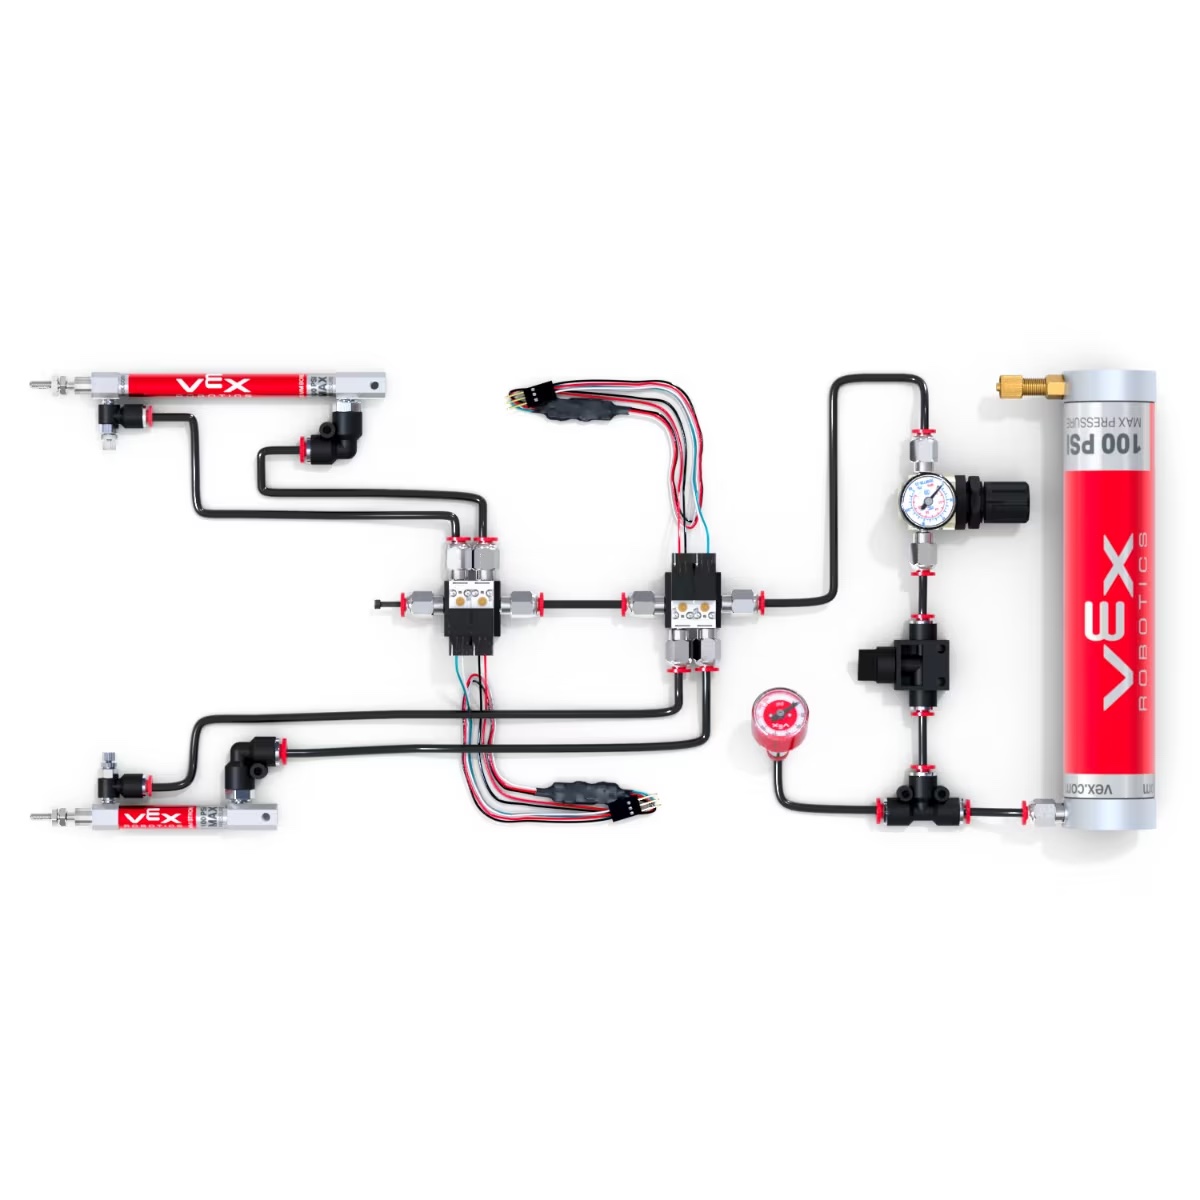
This is the 2023 Pneumatics system. Basically the same function as the prior system but with a few new features, Details at the VEX Website. and instructions at the pneumatics vex library
Old Pneumatics system
the old system components are still in use and described below. The details below are still a good reference for how to use pneumatic systems in general.
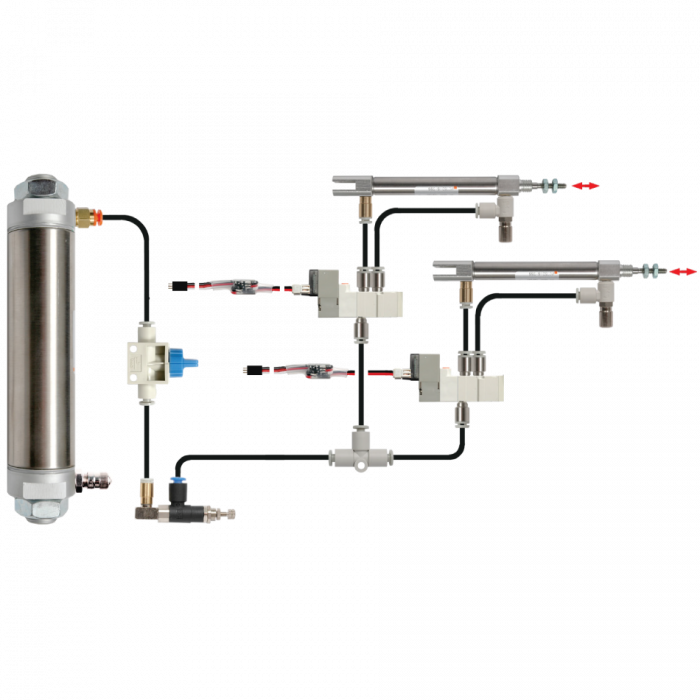
Pneumatic set up is shown in this image. The system requires a tank to store air, a manual valve to control the air. This image shows a system with 2 double acting pistons, each controlled by a solenoid valve.
Pneumatic Device Set Up
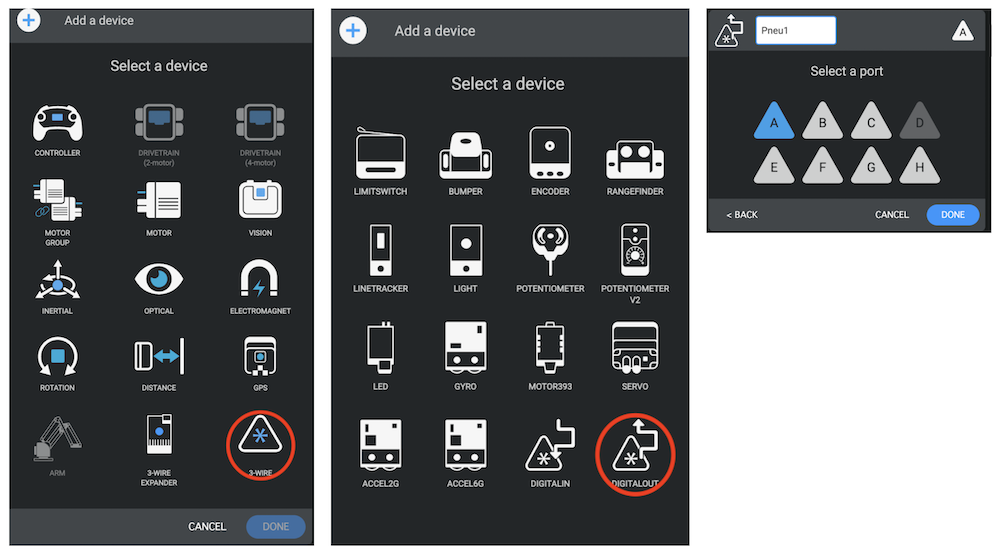
First the device Object must be created in device set up. Select 3 wire port. The device is a digital out, select the port that it is plugged into, for this example we use A but you may have multiple devices using different ports.
Name it something descriptive and use a capital first letter to indicate that it is Global. Here we have used Pneu1
Code for Pneumatics
The code for the VEX pneumatics is basically telling the solenoid valve to switch from one position to another. This is done with a digital signal through the 3 wire ports of the V5 Brain. The method we use is
digital_out.set(bool)
Where bool is either true or false. True will send the air one way, false will send it the other.
in main.cpp these lines can now be written in any function to control the pneumatics.
  Pneu1.set(true);
  wait(1000, msec);
  Pneu1.set(false);
  wait(1000, msec);
  Pneu1.set(true);
This code will just move the pneumatic cylinder from one position to the other after waiting a second between moves.
Another method available for Pneumatics is to determine what the solenoid is set at:
Pneu1.value();
will return true or false depending on what was the last set of the solenoid. We can use this to create a toggle function for the pneumatic solenoid valve.
Pneu1.set(!Pneu1.value());
Will set the solenoid to the opposite of where it is now.
Driver Control
Here is a user control code that will let you move a pneumatic based on pushing buttons A or B
void driverControl() {
  while (true) {
    if (Controller1.ButtonA.pressing()) {
      Pneu1.set(true);
    } else if (Controller1.ButtonB.pressing()) {
      Pneu1.set(false);
    }
  }
}
Function
Using a function will organize your code better and make it easier to debug any problems. To write a function we need a type, a name, a list of arguments and some code conetained in curly braces.
void pushPneu1(bool push)
{
  Pneu1.set(push);
}
This is our function. It just sets the Pneumatic to true or false based on the argument that we send it when we call the function. Next is how to call the function from driver control. This code will set the pneumatic when we push buttonA. or send it the other way when we push buttonB
void driver() {
  // User control code here, inside the loop

  while (true) {

    //use ButtonA and ButtonB to activate the Pneumatic 1
    if(Controller1.ButtonA.pressing())
    {

      pushPneu1(true);
    }
    else if(Controller1.ButtonB.pressing())
    {
      pushPneu1(false);
    }
    wait(10, msec); // Sleep the task for a short amount of time to
                    // prevent wasted resources.
  }
}
You can also call this function while in auton mode.