Product Design Using Hard Points
3D Design and Printing for inventions
3D Design and printing is a powerful tool to speed your inventions to real products. In this lesson we will show some techniques of product design using 3D design and printing. this lesson assumes you already know something about CAD and 3D prin ting, best if you have take our course on 3D Printing.
Product Design
suppose we have just invented the best and newest unique test meter. This meter can do thing that other test equipment can not. It is sure to be a great product. Now it needs to be packaged in a useful form that people will like to have and use. If you simply research multi meters using a google or amazon search you will find many forms that all do the same thing.
Package Design
We will now design a box or package for the meters we have been developing. We can do just about anything we want on the outside, but on the inside we have some common features. The constraints of design are called hard points. for example if we need to mount our Arduino board into the package there are 4 screw holes that must be in specific places. These four places are called Hard Points.
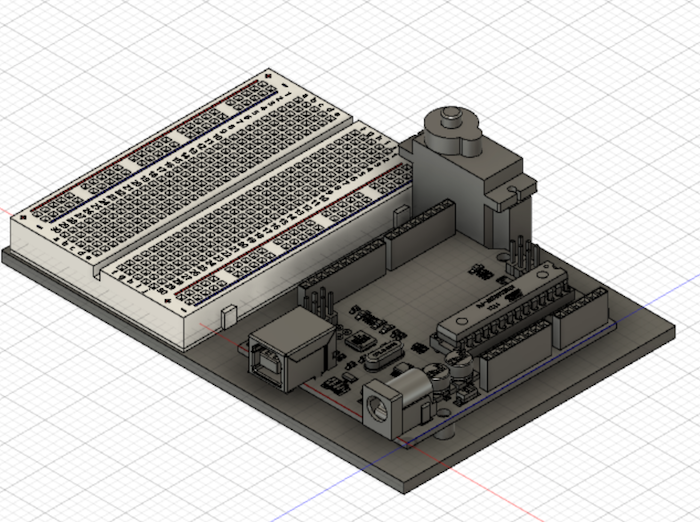
Here is a basic circuit using the Arduino Uno, a Breadboard and a servo. these items will determine some constraints on the design of the package.
Hard Points
The required components will define Hard Points for mounting. the Arduino has 4 mounting screws that need to be in specific points the servo needs a mounting point and the breadboard needs a flat place to stick it down with sticky tape.
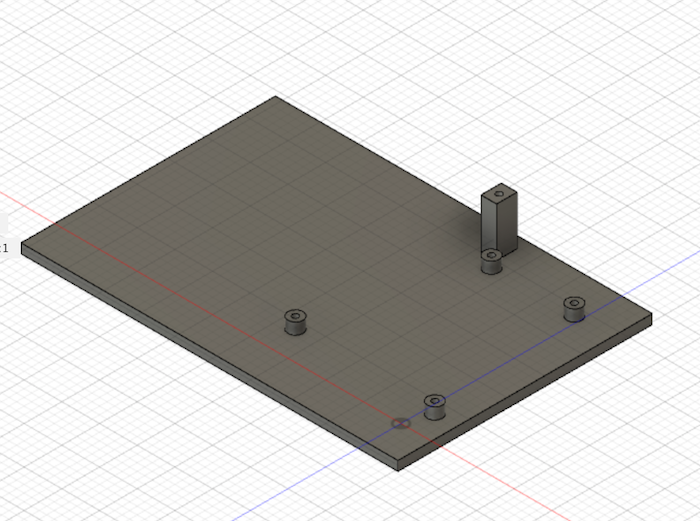
Thje required Hard Points are shown in this model. Start with this, do not edit the hard points, but you can get creative with all the space outside of the mounting points.
You can start with this file from our fusion team project. Ask to be invited to the team workspace.
Do not edit this file , rather place it in your design and add to it.
MIT Toy Design Lecture
Here is a related lecture by professor Wallace of MIT Design at MIT