Servo Motors
Making Things Move
In this lesson we will be looking at servo motors. The servo is a special type of motor and control circuit that can make and hold a movement to a specific position. Most have a range of about 270 degrees so you do not rotate completely around rather move from position to position.
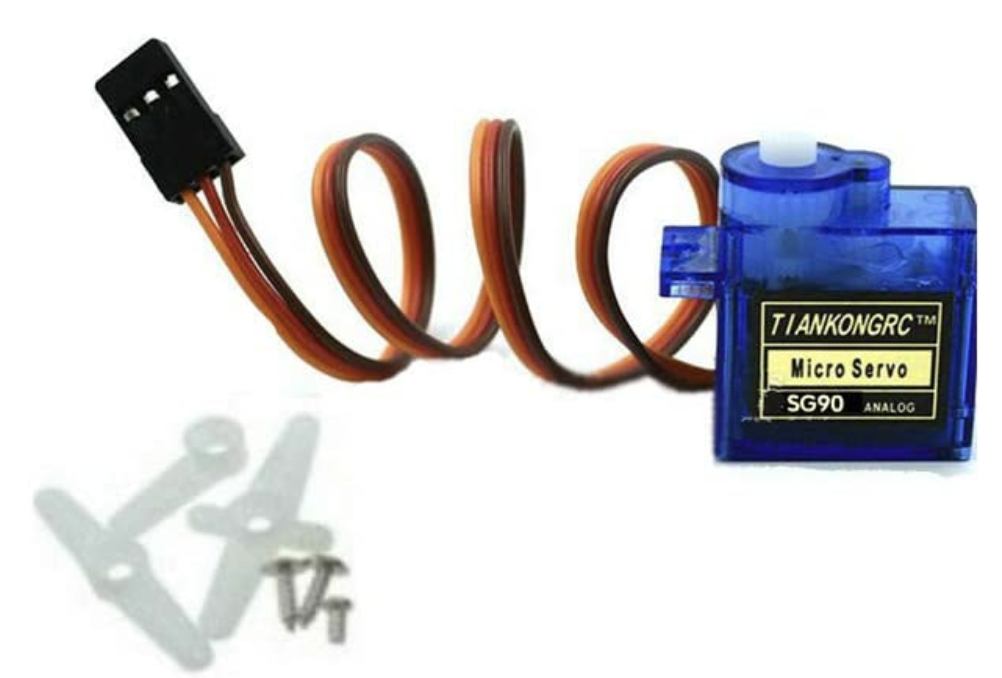
Here is a typical micro servo. It is small but perfect for demonstrating how a servo works and how to write code for it. Notice that it is a 3 wire device. In this picture the wires are Orange, Red and Brown. It has 2 wires for power + (RED) and - (BROWN), and an additional wire for signal(ORANGE). The - or ground wire is also used for the signal return so if you are using a battery separate from you Arduino you need to be sure to connect the ground wire also to the GND pin of the Arduino. Some servos use White Red and Black color for the wires, White is Signal,Red +, Black - or GND.
The servo also comes with an assortment of attachments for connecting it to devices. They can be put onto the servo axel with the small screws provided.
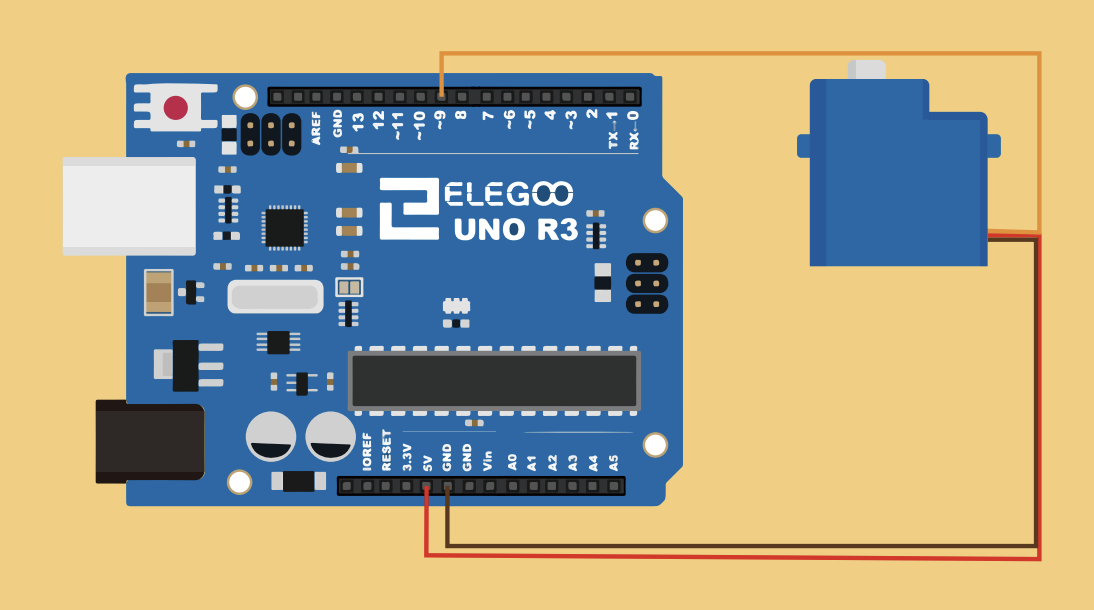
Simple wiring diagram of the Arduino and Servo. You may need to add some jumper wires since the servo is female connector and so is the Arduino. The connection of the signal wire to pin 9 is arbitrary if you want to connect is to any other pin we will just change it in the code. Similarly if you want to connect more than one servo you will use other pins.
Code for Servo
To control the servo we will use the Servo library. Very simply put #include
Here is some sample code that you can copy and paste into the arduino IDE.
//www.elegoo.com
//2018.12.19
#include <Servo.h>
/* After including the corresponding libraries,
   we can use the "class" like "Servo" created by the developer for us.
   We can use the functions and variables created in the libraries by creating
   objects like the following "myservo" to refer to the members in ".".*/

Servo myservo;
//it created an object called myservo.
/*  you can see Servo as a complex date type(Including functions and various data types)
    and see myservo as variables.               */

void setup(){
  /*"attach" and "write" are both functions,
     and they are members contained in the complex structure of "Servo".
     We can only use them if we create the object "myservo" for the complex structure of "Servo".
  */
  myservo.attach(9);//connect pin 9 with the control line(the middle line of Servo)
  myservo.write(90);// move servos to center position -> 90°
}
void loop(){
  myservo.write(90);// move servos to center position -> 90°
  delay(1000);
  myservo.write(60);// move servos to center position -> 60°
  delay(1000);
  myservo.write(90);// move servos to center position -> 90°
  delay(1000);
  myservo.write(120);// move servos to center position -> 120°
  delay(1000);
}
This code will make your servo move to several positions and wait for 1 second at each. You can mess around with changing numbers to see what you get. Remember every change you make must be downloaded to the arduino before it will take effect.
Inventing with Servos
In keeping with our goal of making something Useful and Unique we will use the servo to display the value of a measured voltage. This will make it look like an Old School meeter with a swinging needle. With the addition of a temperature sensor in future lessons we can make a dial display thermometer.
For the Hardware we just need our servo and possibly a nice arrow or needle indicator we can make from paper, cardboard or foam core.
Steps in the code will be:
- include servo library
- create servo object
-
Servo myservo;
-
myservo.attach(9);
-
- Read Voltage from analog pin - remember it reads 0 - 1023 for 0 - 5V
-
float V=analogRead(A1);
- You may want to use the map function. Explore Arduino the Reference page for map
-
- Convert the voltage to a servo position perhaps 0 to 180 degrees for 0 to 5V
- Again maybe use map function. You could actually skip mapping the voltage and go directly from 0-1023 to 0 to 180 degrees
- Send that position to the servo - remember to wait some delay amount to let the servo move
-
  myservo.write(V);// move servos to center position -> V° that was mapped from analogRead
  delay(50); //adjust this number to allow for servo motion but not too much lag
-